A dripping bathtub faucet can be an annoying and wasteful problem that not only disrupts your peace but also leads to unnecessary water wastage. The constant sound of dripping water can be a constant source of irritation, not to mention the impact on your water bill. Fortunately, fixing a dripping bathtub faucet is a manageable DIY task that can save you money on water bills and prevent further damage. In this comprehensive guide, we will walk you through the steps to troubleshoot and fix a dripping bathtub faucet.
Understanding the Anatomy of a Bathtub Faucet:
To successfully fix a dripping faucet, it’s crucial to have a basic understanding of the different parts that make up a bathtub faucet. Modern faucets typically consist of handles, a spout, a stem, O-rings, washers, and other internal components.
Knowing these parts will aid you in identifying the source of the drip. Faucet designs may vary, so it’s essential to consult your faucet’s manual or manufacturer for specific details.
Tools and Materials You’ll Need:
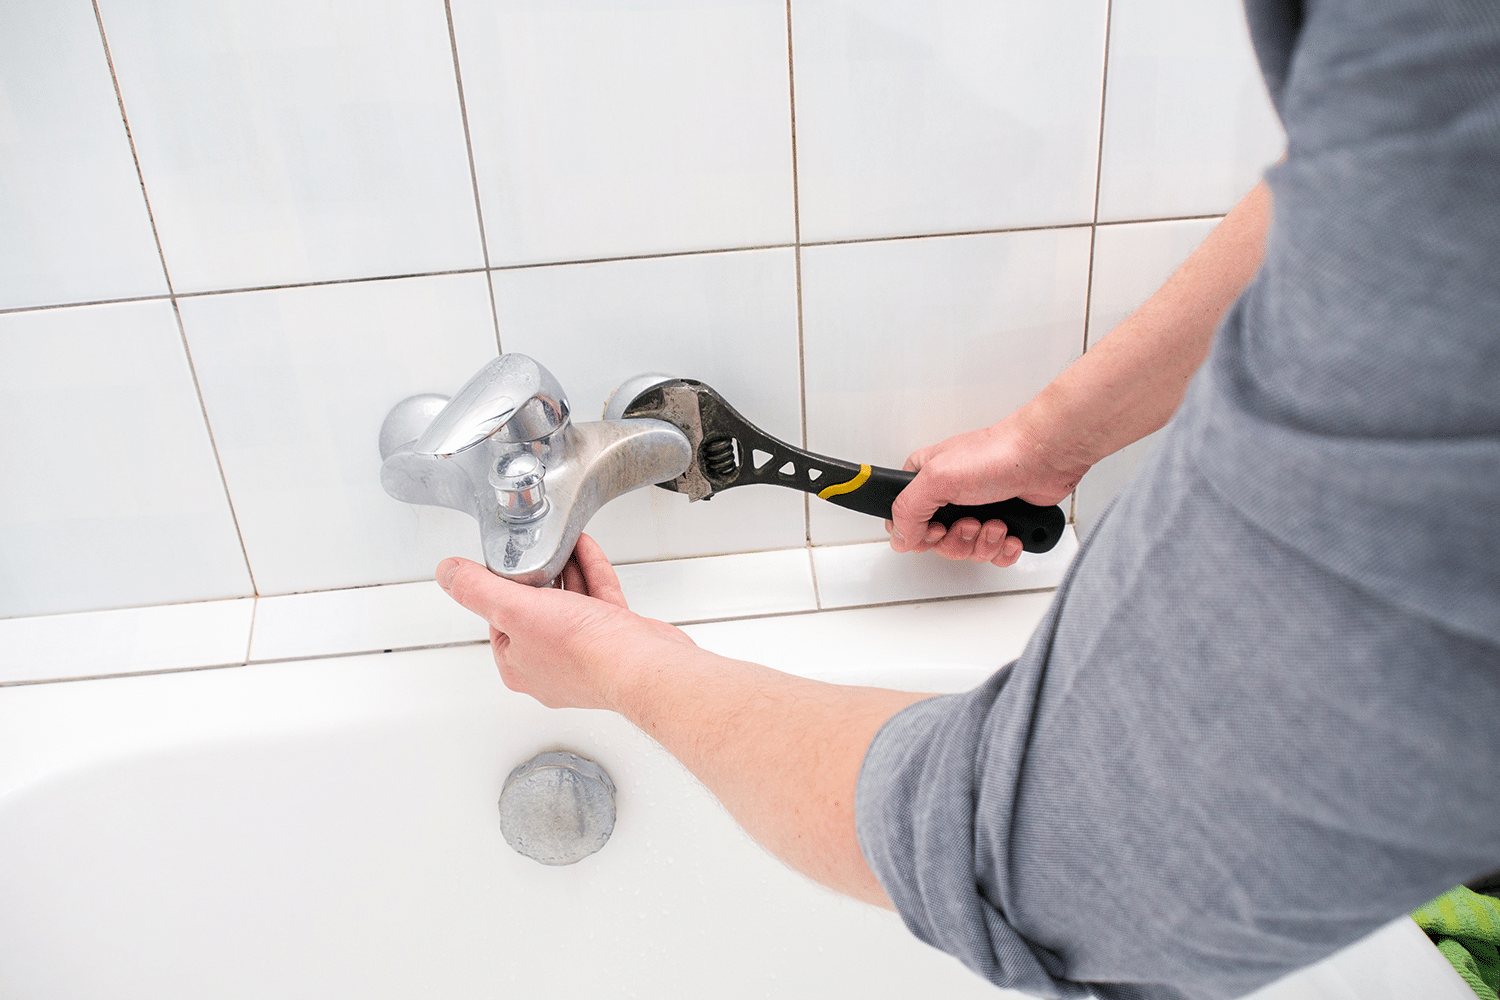
Before starting the repair, gather the necessary tools and materials. Common items include an adjustable wrench, screwdrivers, pliers, plumber’s tape, replacement washers or O-rings, and a bucket or towel to catch excess water.
Having these on hand will streamline the repair process and help you avoid frustrating interruptions to search for tools.
Turning Off the Water Supply:
Begin the repair process by turning off the water supply to the bathtub. Locate the shut-off valves beneath the sink or behind an access panel.
If there are no individual shut-off valves, you may need to turn off the main water supply to your home. Ensure that the water is completely turned off before proceeding with the repair.
Removing the Faucet Handle:
Use a screwdriver or an Allen wrench to carefully remove the faucet handle. This step may require patience, as handles can sometimes be tightly secured.
Once the handle is off, you’ll gain access to the internal components of the faucet. Be cautious and gentle during this step to avoid damaging any parts.
Inspecting and Replacing Washers or O-rings:
The most common cause of a dripping faucet is worn-out washers or O-rings. Inspect these components for any signs of damage or deterioration. Replace them with new ones if necessary.
Apply plumber’s tape to ensure a watertight seal. Take note of the size and type of washers or O-rings to ensure you get the correct replacements.
Reassembling the Faucet:
After replacing the faulty components, carefully reassemble the faucet in the reverse order of disassembly. Tighten all screws and connections securely, but avoid over-tightening to prevent damage.
Ensure that all parts are properly aligned and seated to prevent future leaks.
Testing and Fine-Tuning:
Turn the water supply back on and test the faucet for leaks. If the dripping persists, you may need to adjust the tightness of the components or check for other issues.
Run both hot and cold water to thoroughly test the faucet. Be patient and thorough in your testing to ensure a successful repair.
When to Seek Professional Help:
If, after following the steps above, the faucet continues to drip, or if you encounter difficulties during the repair process, it may be time to consult a professional plumber.
Some issues may require specialized knowledge and tools. Additionally, if your faucet is old or severely damaged, it might be more cost-effective to replace it.
FAQs:
Q1: Why is my bathtub faucet dripping?
A1: The most common reasons for a dripping bathtub faucet are worn-out washers or O-rings, which can lead to leaks. Sediment buildup or a faulty valve may also be contributing factors.
Q2: Can I fix a dripping bathtub faucet myself?
A2: Yes, many dripping faucet issues can be resolved with basic DIY skills. This guide provides step-by-step instructions to help you fix the problem. However, if you are unsure or encounter difficulties, it’s advisable to seek professional help.
Q3: Do I need any special tools for the repair?
A3: Basic tools like screwdrivers, pliers, and an adjustable wrench are usually sufficient. Additionally, you may need replacement washers or O-rings and plumber’s tape. Having the right tools will make the process smoother and more efficient.
Q4: How long does it take to fix a dripping bathtub faucet?
A4: The repair time varies based on the complexity of the issue. Simple fixes, such as replacing a washer, may take less than an hour, while more intricate problems might require more time. Factor in time for testing and adjustments.
Q5: Can I use any type of replacement washers or O-rings?
A5: It’s essential to use the correct replacement parts for your specific faucet model. Consult the manufacturer’s guidelines or bring the old parts to a hardware store to find suitable replacements. Using the wrong parts can lead to improper sealing and continued leaks.
Q6: What if the dripping persists after the repair?
A6: If the dripping continues, check the tightness of components and inspect for any additional issues. Make sure all connections are secure, and there are no visible signs of damage. If problems persist, consider seeking professional plumbing assistance to diagnose and address the underlying issue.
Q7: Is it necessary to turn off the water supply before starting the repair?
A7: Yes, turning off the water supply is crucial to prevent flooding and ensure a safe working environment. Always shut off the water supply before attempting any faucet repair to avoid water damage and accidents.
Conclusion:
Fixing a dripping bathtub faucet is a rewarding and cost-effective DIY task that can be accomplished with basic tools and a little patience. By following the comprehensive guide provided here, you can troubleshoot and repair common faucet issues on your own. Remember to be thorough in your inspection, use the right tools, and seek professional help if needed. A well-maintained faucet not only eliminates the annoying drip but also contributes to a more efficient and sustainable home.

A group of home improvement enthusiasts and bathroom design experts, combines in-depth knowledge and a shared passion to deliver engaging, informative content that guides readers through the world of bathroom innovation and style.
Leave a Reply