Introduction:
In the intricate world of home plumbing, the wax ring emerges as a seemingly modest yet indispensable component, specifically within the confines of your toilet. Serving as the linchpin of the plumbing system, the wax ring prevents water leaks and potential damage to your property. Over time, the wear and tear it endures can compromise its efficacy, making it imperative for homeowners to recognize the telltale signs of deterioration and possess the know-how to replace it. In this comprehensive guide, we will delve into the intricacies of each step, providing a detailed walkthrough to ensure a flawless and water-tight toilet seal, safeguarding your home from the perils of plumbing issues.
I. Gather Necessary Tools and Materials:
Before embarking on the meticulous process of wax ring replacement, assembling the necessary tools and materials is paramount. This checklist includes a wrench, putty knife, a new wax ring, bolts, and a sponge or towel. Equipping yourself with these essentials ensures a streamlined and efficient process, setting the stage for a successful toilet seal restoration.
II. Preparation:
Initiate the replacement process by exercising due diligence in turning off the water supply to the toilet. Following this, flushing the toilet evacuates both the tank and bowl, and a diligent removal of any residual water with a sponge or towel creates an optimal environment for the forthcoming wax ring replacement. This preparatory step not only ensures a clean workspace but also minimizes potential mess during the subsequent phases.
III. Remove the Toilet:
With the water supply disconnected and the residual water eliminated, the next step involves the detachment of the toilet. Unfasten the nuts securing the toilet to the floor bolts, and with caution, lift the toilet from its position. Placing the toilet aside provides unobstructed access to the wax ring, expediting its removal and replacement.
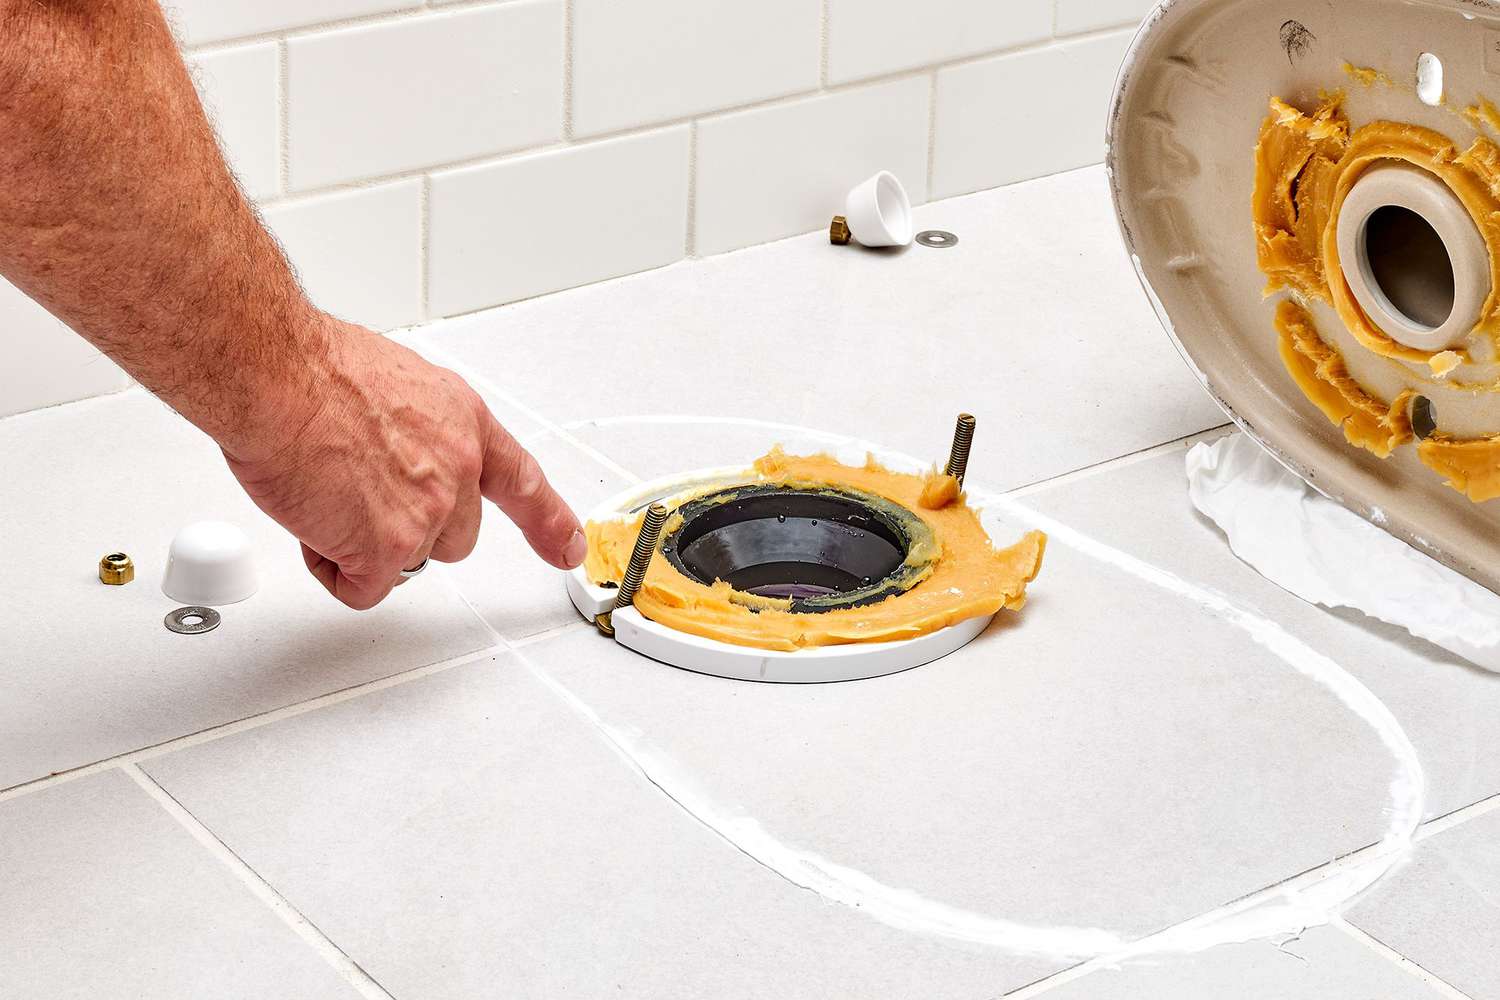
IV. Remove the Old Wax Ring:
The meticulous removal of the old wax ring comes next, and this is where the putty knife takes center stage. Carefully scraping off the aged wax from both the flange and the toilet’s base is crucial. Simultaneously, a thorough inspection and cleaning of the flange ensure the absence of damage or debris that might compromise the integrity of the new seal. This meticulous cleaning process forms the foundation for a durable and effective seal.
V. Install the New Wax Ring:
Selection of the appropriate-sized wax ring is key, and positioning it meticulously on the flange sets the stage for the installation process. Lowering the toilet onto the wax ring, aligning the bolts with the mounting holes, and applying even pressure ensures a snug fit. This step is pivotal in establishing a reliable and long-lasting seal that guards against water leaks.
VI. Secure the Toilet:
The subsequent phase involves securing the toilet in its newly restored position. Placing washers and nuts onto the bolts and tightening them with a wrench is a delicate task. Caution must be exercised not to overtighten, as this could lead to damage to the toilet or the flange. Reconnecting the water supply line completes the process, restoring the toilet’s functionality.
VII. Test for Leaks:
A critical step in the wax ring replacement process is testing for leaks. Turning on the water supply, flushing the toilet, and meticulously checking for any water leaks around the base are imperative. If leaks are detected, tightening the nuts appropriately eliminates the issue. This thorough testing phase ensures the longevity and effectiveness of the new wax ring.
VIII. Finishing Touches:
The finishing touches involve trimming any excess bolt length if needed and considering caulking around the base of the toilet for a polished look. While caulking is optional, it adds a final touch that enhances both the aesthetic appeal and the overall cleanliness of the toilet area.
IX. Clean Up:
Post-installation, a comprehensive clean-up is essential. Wiping down the toilet and its surroundings, disposing of old materials responsibly, and cleaning the tools utilized in the process ensure that your bathroom is left in a tidy state, free from any debris or remnants of the replacement procedure.
X. Final Inspection:
A final inspection serves as the last checkpoint in the wax ring replacement journey. Ensuring the toilet is securely in place and meticulously checking for any signs of leaks or issues guarantees the success of the replacement. This thorough examination provides peace of mind regarding the reliability of the toilet and the integrity of the newly installed wax ring.
FAQs:
Q1: How often should I replace the wax ring on my toilet?
A1: Routine replacement every 5-10 years is recommended, or sooner if signs of leakage become apparent. This proactive approach ensures the ongoing effectiveness of the wax ring seal.
Q2: Can I reuse the old wax ring?
A2: No, it is advisable to use a new wax ring for a proper and reliable seal. Reusing an old wax ring can compromise the effectiveness of the seal and lead to leaks.
Q3: Why is it essential to inspect the flange?
A3: Inspecting the flange is crucial as it ensures it is in good condition, free from damage or debris. A well-maintained flange promotes a secure seal between the toilet and the plumbing system, preventing leaks and ensuring long-term functionality.
Conclusion:
Embarking on the journey of replacing a wax ring on your toilet may initially seem like a formidable task, but armed with the right tools and our comprehensive step-by-step guide, you can confidently undertake this essential home maintenance project. Regular inspection and timely replacement not only prevent potential leaks but also contribute to the overall longevity and efficiency of your plumbing system. Taking the time to care for your toilet ensures it will continue to serve you well for years to come, providing a reliable and watertight seal that protects your home from plumbing issues and potential water damage.

A group of home improvement enthusiasts and bathroom design experts, combines in-depth knowledge and a shared passion to deliver engaging, informative content that guides readers through the world of bathroom innovation and style.
Leave a Reply